If you want to ensure that your oscilloscope is providing accurate readings, it needs to be properly calibrated. This process can seem daunting, but with our step-by-step guide, you’ll be an expert in no time!
In order to start first check what kind of the oscilloscope you have. In case it is an old-style CRT, pay attantion that the CRT display of the oscilloscope will usually take time to warm up and stabilize. This process can be accelerated by allowing it sit idle for about ten minutes before using, but you should always allow at least that much room in order not only view your data clearly without any interruptions from screenshake or blurring effects (which may happen if we turn our instruments too quickly after coming out of standby mode), but also prevent damage done through overheating due to a sudden power-on.

Once the probe is in place, we can turn on our oscilloscope and begin the process of calibrating it. The first thing we need to do is adjust the settings so that the display is clear and easy to read. To do this, we’ll use the brightness and contrast controls. For best results, start with the contrast all the way up and the brightness at about half-way.
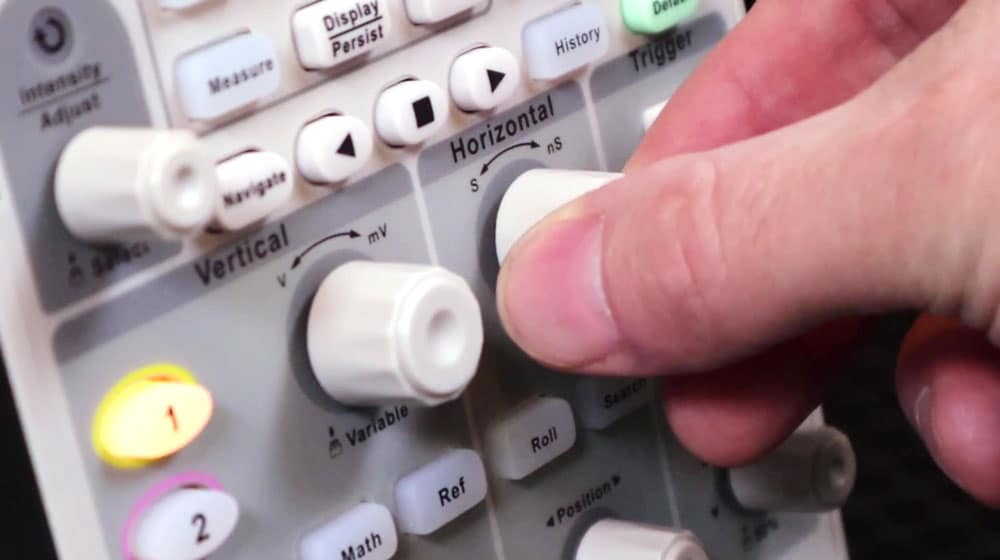
The next step is to set the horizontal scale, which tells our oscilloscope how many seconds we want it to measure per division on the screen. Again, for most purposes a setting of 2s/div should suffice, but feel free to adjust as needed.
Finally, we need to set the timebase. This is how we tell our oscilloscope how often it should take a reading. For most purposes, a setting of 2s/div should suffice, but feel free to adjust as needed.
And that’s it! You’ve now successfully calibrated your oscilloscope and are ready to start using it.
Here are all the steps again in a short version, which you can copy/paste and send to your friend.
Follow these steps to calibrate your oscilloscope:
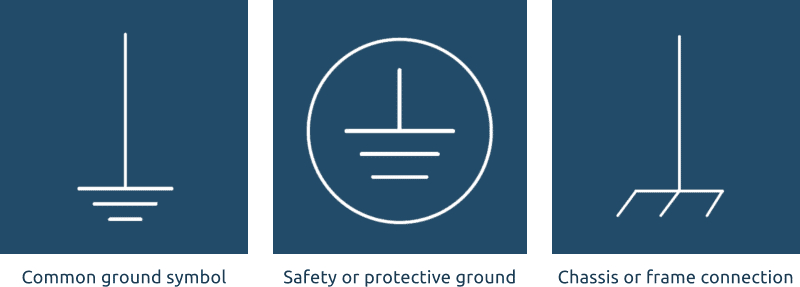
- 1. First, you need to check the probe. Make sure that it is properly connected to the oscilloscope and that the ground clip is secure.
- 2. Next, select the channel that you want to calibrate.
- 3. Now you need to find a stable signal source. This can be either an internal or external signal source. If you’re using an external signal source, make sure that it is properly connected to the oscilloscope.
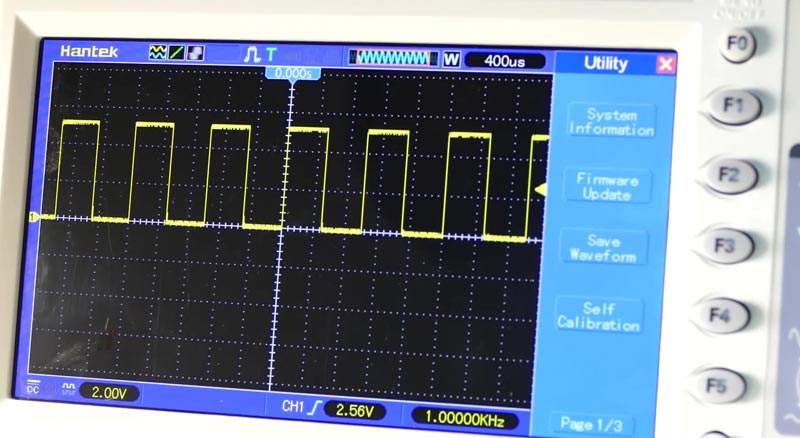
- 4. Once you have found a stable signal source, you need to adjust the amplitude and offset controls until the signal is centered on the screen.
- 5. Finally, use the timebase control to adjust the horizontal position of the signal on the screen.
What are the common Oscilloscope probing pitfalls to avoid?
1. Not Checking the Probe
One of the most common mistakes is not checking the probe. Make sure that it is properly connected to the oscilloscope and that the ground clip is secure.
2. Selecting the Wrong Channel
Another mistake is selecting the wrong channel. Be sure to select the channel that you want to calibrate.
3. Not Using a Stable Signal Source
You need to find a stable signal source in order to calibrate the oscilloscope properly. This can be either an internal or external signal source. If you’re using an external signal source, make sure that it is properly connected to the oscilloscope.
4. Not Adjusting the Amplitude and Offset Controls
Once you have found a stable signal source, you need to adjust the amplitude and offset controls until the signal is centered on the screen.
5. Not Adjusting the Timebase Control
Another mistake is not adjusting the timebase control. This control determines the horizontal position of the signal on the screen. Make sure to adjust it so that the signal is properly centered.
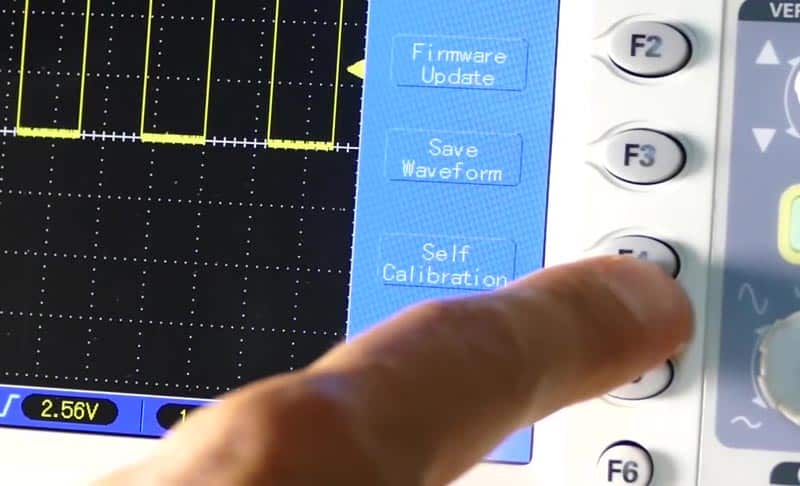
6. Not Checking the Probe Compensation
Another common mistake is not checking the probe compensation. This needs to be done in order to ensure accurate measurements. You can find more information on how to check the probe compensation in the user manual.
7. Not Following the Manufacturer’s Recommendations
Finally, make sure to follow the manufacturer’s recommendations when calibrating the oscilloscope. This will help ensure accurate measurements.
FAQ – How to calibrate an oscilloscope?
Do you need to calibrate an oscilloscope?
Yes, you should calibrate your oscilloscope regularly in order to ensure accurate measurements.
How often should you calibrate an oscilloscope?
It is generally recommended that you calibrate your oscilloscope at least once a year. However, if you use your oscilloscope frequently or for critical applications, you may want to calibrate it more often.
What is the best way to calibrate an oscilloscope?
There are many ways to calibrate an oscilloscope, but the most important thing is to use a stable signal source. Once you have found a stable signal source, you can adjust the amplitude and offset controls until the signal is centered on the screen.
How can you make an oscilloscope more accurate?
There are several ways to make an oscilloscope more accurate, including:
- Use a stable signal source
- Adjust the amplitude and offset controls until the signal is centered on the screen
- Use the timebase control to adjust the horizontal position of the signal on the screen
- Calibrate your oscilloscope regularly
Why do we need to calibrate the probe oscilloscope?
The probe is a critical part of the oscilloscope and needs to be calibrated in order to ensure accurate measurements.
What will happen if no calibration were done on oscilloscope?
If you don’t calibrate your oscilloscope, you may end up with inaccurate measurements. This can lead to problems in your work or experiments. This is why it is important to properly calibrate the oscilloscope before its usage.
Do I need to calirate a Rigol or Siglent?
Yes, all oscilloscopes need to be calibrated in order to ensure accurate measurements. Does not matter which model you have and what is the manufacturer. You can find more information on how to calibrate your oscilloscope in the user manual. Follow this link to find manuals for Rigol, here you can find all info for Siglent and here all necessary manuals for
How to calibrate an oscilloscope? – Final thoughts
Calibrate your oscilloscope regularly and you will have no problems with test results. Don’t forget that inaccurate measurements lead to inaccurate electronics, you will end up having to do the same job twice, so take a few minutes to calibrate to save your time.
For best results, always use the manual provided by the manufacturer and follow the steps in our guide on how to calibrate an oscilloscope.
Did you like our guide How to calibrate an oscilloscope? Please let us know and don’t forget to check our other articles.
Best Digital Oscilloscope – could be interesting for you!